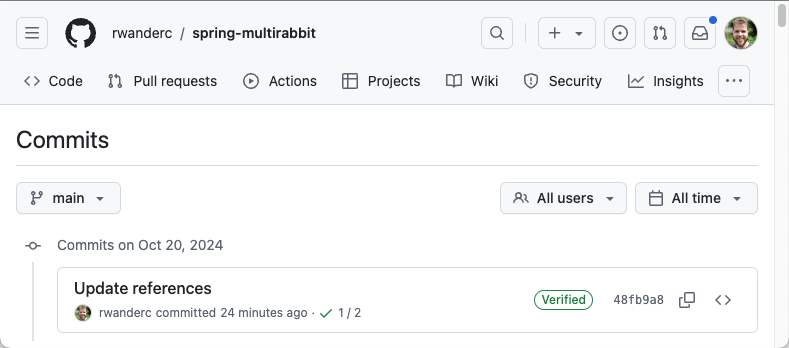
In this post, we will enable you to have GitHub verified commits. For that, you have to:
- Create a GPG key
- Configure GitHub with its public key
- Configure your git to sign commits
Creating a GPG key
- Install the tool in your OS.
brew install gpg // MacOS
apt install gnupg2 // Linux (Debian-based)
If you just installed the tool, you should have no keys yet. You can check by running:
gpg --list-secret-keys
- Create the key. You can choose between a default mode and a personalized mode.
gpg --generate-key // Using defaults
gpg --full-generate-key // Personalized way
The default will use the recommended encryption algorithm and parameters. We will proceed the tutorial based in this option.
- Provide your name and email, and confirm your input pressing ‘O’.
$ gpg --generate-key
gpg (GnuPG) 2.4.5; Copyright (C) 2024 g10 Code GmbH
This is free software: you are free to change and redistribute it.
There is NO WARRANTY, to the extent permitted by law.

Note: Use "gpg --full-generate-key" for a full featured key generation dialog.

GnuPG needs to construct a user ID to identify your key.

Real name: Wander Costa
Email address: contact@wandercosta.com
You selected this USER-ID:
    "Wander Costa <contact@wandercosta.com>"

Change (N)ame, (E)mail, or (O)kay/(Q)uit? O
- You will be redirected to another CLI screen to provide a passphrase for the new key. Provide a secure passphrase, repeat, and then press the OK button (using tabs, arrow keys, and enter).
┌─────────────────────────────────────────────────────────────┐
│ Please enter the passphrase to                              │
│ protect your new key                                        │
│                                                             │
│ Passphrases match.                                          │
│                                                             │
│ Passphrase: _______________________________________________ │
│                                                             │
│ Repeat: ___________________________________________________ │
│ ┌─────────────────────────────────────────────────────────┐ │
│ │                                                         │ │
│ └─────────────────────────────────────────────────────────┘ │
│        <OK>                                   <Cancel>      │
└─────────────────────────────────────────────────────────────┘
- After confirming, you will be returned to the CLI screen, which will look like:
$ gpg --generate-key
gpg (GnuPG) 2.4.5; Copyright (C) 2024 g10 Code GmbH
This is free software: you are free to change and redistribute it.
There is NO WARRANTY, to the extent permitted by law.

Note: Use "gpg --full-generate-key" for a full featured key generation dialog.

GnuPG needs to construct a user ID to identify your key.

Real name: Wander Costa
Email address: contact@wandercosta.com
You selected this USER-ID:
    "Wander Costa <contact@wandercosta.com>"

Change (N)ame, (E)mail, or (O)kay/(Q)uit? O
We need to generate a lot of random bytes. It is a good idea to perform
some other action (type on the keyboard, move the mouse, utilize the
disks) during the prime generation; this gives the random number
generator a better chance to gain enough entropy.
We need to generate a lot of random bytes. It is a good idea to perform
some other action (type on the keyboard, move the mouse, utilize the
disks) during the prime generation; this gives the random number
generator a better chance to gain enough entropy.
gpg: revocation certificate stored as '/Users/rwander/.gnupg/openpgp-revocs.d/89583357ECC4C864C63BAD52A9D6AAE843B36D1E.rev'
public and secret key created and signed.

pub   ed25519 2024-10-20 [SC] [expires: 2027-10-20]
      89583357ECC4C864C63BAD52A9D6AAE843B36D1E
uid                      Wander Costa <contact@wandercosta.com>
sub   cv25519 2024-10-20 [E] [expires: 2027-10-20]
Note that this key will expire in 3 years. If you want to configure it differently, even defining not expiration, use
the personalized way running gpg --full-generate-key.
Export the Public Key and configure GitHub
- Extract the public key from the GPG key by running the command below. Change the ID to refer to your GPG’s key ID.
$ gpg --armor --export 89583357ECC4C864C63BAD52A9D6AAE843B36D1E
-----BEGIN PGP PUBLIC KEY BLOCK-----

mDMEZxUqexYJKwYBBAHaRw8BAQdAkMSiRO/W7H/BpPUsm1sFqxloAiarsjCBslad
5Q6Cjqi0JldhbmRlciBDb3N0YSA8cndhbmRlckB3YW5kZXJjb3N0YS5jb20+iJkE
ExYKAEEWIQSJWDNX7MTIZMY7rVKp1qroQ7NtHgUCZxUqewIbAwUJBaOagAULCQgH
AgIiAgYVCgkICwIEFgIDAQIeBwIXgAAKCRCp1qroQ7NtHkCmAQCSanNi18J0CIet
CjA0XCnHKeuXZtTfwVFeOTueFZz5BQEAq2xL4mkKxTwk0sWpr3WenowqEMQIa8Ic
v7ewAOIVtQ64OARnFSp7EgorBgEEAZdVAQUBAQdA+cFbvXQLSOz0dV05bzk46sqK
4IvtukWyI9IZljkXTGgDAQgHiH4EGBYKACYWIQSJWDNX7MTIZMY7rVKp1qroQ7Nt
HgUCZxUqewIbDAUJBaOagAAKCRCp1qroQ7NtHuCzAP9ZxQVEYlWwMbr6nnUmIsIi
LLgNh8kL692uGUr8pxdNjAEA/Hx85wliFYsKR+3VZ86zN5q+6d2TeAwUqXdfaYIt
Ygk=
=gMjt
-----END PGP PUBLIC KEY BLOCK-----
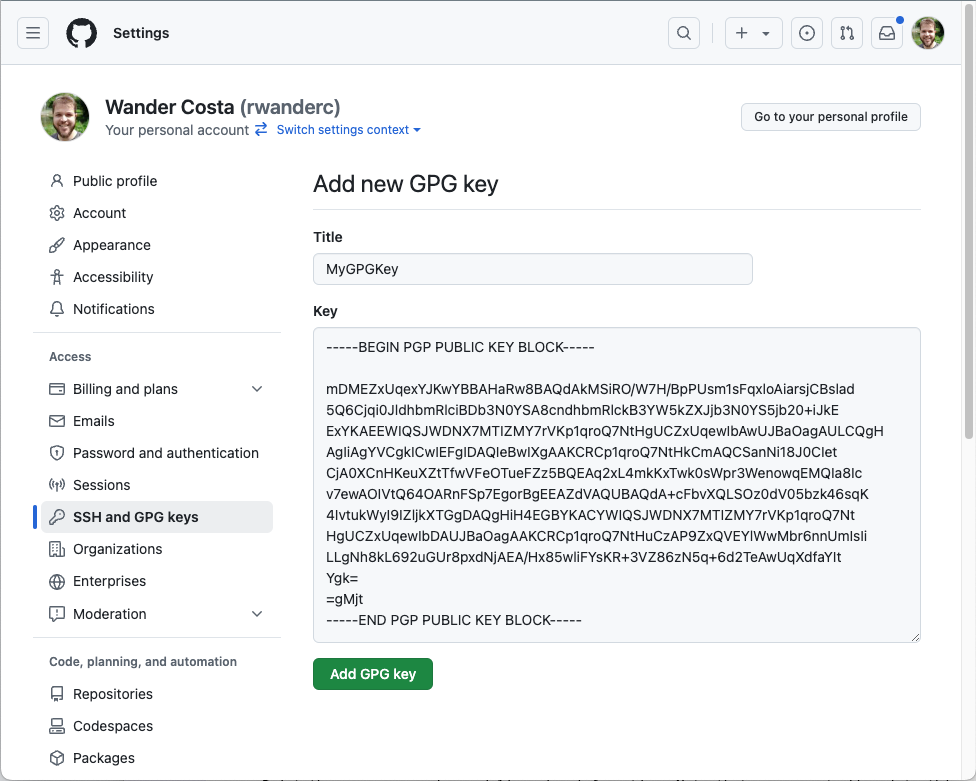
- Access your Settings page at GitHub and click on SSH and GPG keys.
- Click the button New GPG key.
- Choose a name for your key, and paste the content from the public key, obtained in step [1].

Configure git to sign commits
To configure it to any repository, run:
git config --global commit.gpgsign true
To configure it for a specific repository, run it under the repo’s folder:
git config commit.gpgsign true
Results
